Translate

Showing posts with label Tiny house. Show all posts

Friday, December 18, 2020

Tiny House backyard

Time to work on the outside of the first floor


I am really proud of that bay window, 

yeah its a little chunky

and yeah, it's not even or straght 

but I made it from scratch 

myself.

Therefore it is awesome.


Here is the whole backside mostly done


Doesn't that little bit of brick foundation look real?


So cool when that happens!


So now I have all these bricks left over


I think I'll make a patio


Needed to place the greenhouse 

so I could judge where to stop

If you do this, brick by brick, start in the corner

Duh.


Here you can kind of make out the stair step pattern


This is almost as therapeutic as sewing together 2" blocks, almost.


Now it needs some grass 


I'm just a girl with a glue bottle today


all this miniature work is oddly satisfying.


I have a tendency to go overboard on new things and then 


never finish them when I loose interest or life pushes it aside

So getting this far is something


I have plans for a second floor 


and furnishings for the rest of the house


Lets see how far I get


For now I'm pleased with the backyard so far.


Everything needs some weathering 

It looks too newly painted


and It needs more plants


but so far so good


Tuesday, December 8, 2020

Tiny House Livingroom


The Living room needs help


I have discovered that yes

 I do need to cover that doorway with wall paper 


because you can see it from the front 

AND the window

I wish I'd figured that out  

BEFORE I glued the walls together!


It's not a difficult job but would have been faster to do if I hadn't

Glued everything together first. *Sigh*


 So here it is with some garden furniture for scale


It's very pink


And It needs furniture 

but I haven't decided how it should look


I haven't decided who lives here yet either


I think the who would inform the what 


but I haven't gotten that far yet


Saturday, November 21, 2020

One down


the Kitchen floor
In the beginning there was a floor and some walls and a whole lotta parts

I thought I had taken more pictures at this stage but it was months ago now and I cant find them.

Waiting in the wings
 

Assembling after wall papering & flooring

with size appropriate graphics 45 

paper 

The ceiling
I also experimented with some of my paper cutting dies 

for the tin look on the ceiling and  walls 

This one came out quite well. Wiring is an acquired skill, I have obviously not mastered yet.

Rats nest
Though it is not as scary as it looks (really!)

this is 3 rooms worth that will run off the ceiling of the kitchen.

Inside wall wireing

The short hallway leading from the front room to the stair room is around enough of a corner it shouldn't be seen from any angle, I hope!

Because that is a nasty mess!

There is a lot of initial planning that has to be done here

Before I just start to "wing it"

And building out the walls and ceiling with cardboard, elmers glue and spackle is part of it

kitchen through the window

It looks ugly now but some sanding and wallpaper spiffies it up quite a bit!

Here are the done pictures of the assembled kitchen.


Left side


I'm a little chuffed because a few friends have suggested it looks like a real room!

Right side
 

there is a lot of baking going on here


I am really pleased with how this all turned out

Full frontal


 The trim looks good and despite not having a stove top

the kitchen looks like a workable space


Though something seems to be missing.


Here is the ceiling put on 

My wonky hinges


The refrigerator ! 

No wonder it looks strange that big empty spot needs to be filled with a fridge.

I cant find an appropriate one But I did find one on Bently house minis 

Ara is super detailed and very precise.


  She gives you a lot of really good advice and watching her make stuff is soothing.

 I got a ton of great ideas and lots of encouragement to try new stuff

.

From the stair room

she is well worth the watch.

 Her fridge is made for a 1:12 scale house, so I had to scale it down for my size.

I think I succeeded 


Looks pretty good in spite of those wonky hinges


Now on to the front room. Starting with the floor.  Those clamps are a life saver BTW,.

I could use s few little "C" type clamps I cant find any small enough


I'm also quite proud of this window.


I bashed the whole thing with wood, plastic I scrapped from a container 

and cardboard with its front panel ripped off

So now on to siding and maybe some paint for the garden side


This will take some thinking time.

Thursday, November 19, 2020

Into Lilliput

My table when I started
So what started with a 1:24th scale room kit

 Has ballooned into several kits and a few

Other things here and there

 I started this shindig with the stairs

They just seemed so cozy, with the fireplace 

and all the snug little cubbies for chotchkies

In a nod to 2020, I found these tiny wine bottles 

and used my own fabric for the chair

Though looking at it it needs some trim.

I lovingly assembled them and all the 

little parts, then decided I needed real tiny bricks 

for the fireplace and it stalled, so I bought another kit

 This is your only warning! Tiny rooms are addictive.

A little bit about the kits you can find tiny room kits 

on amazon and ETSY 

they run from about $30 that are just a room, 

to $80 for the larger house kits

 I ultimately got 6 kits, most are single room kits

And I have now decided to kitbash 

a house from the pieces

Because the kits weren't fiddly enough by themselves

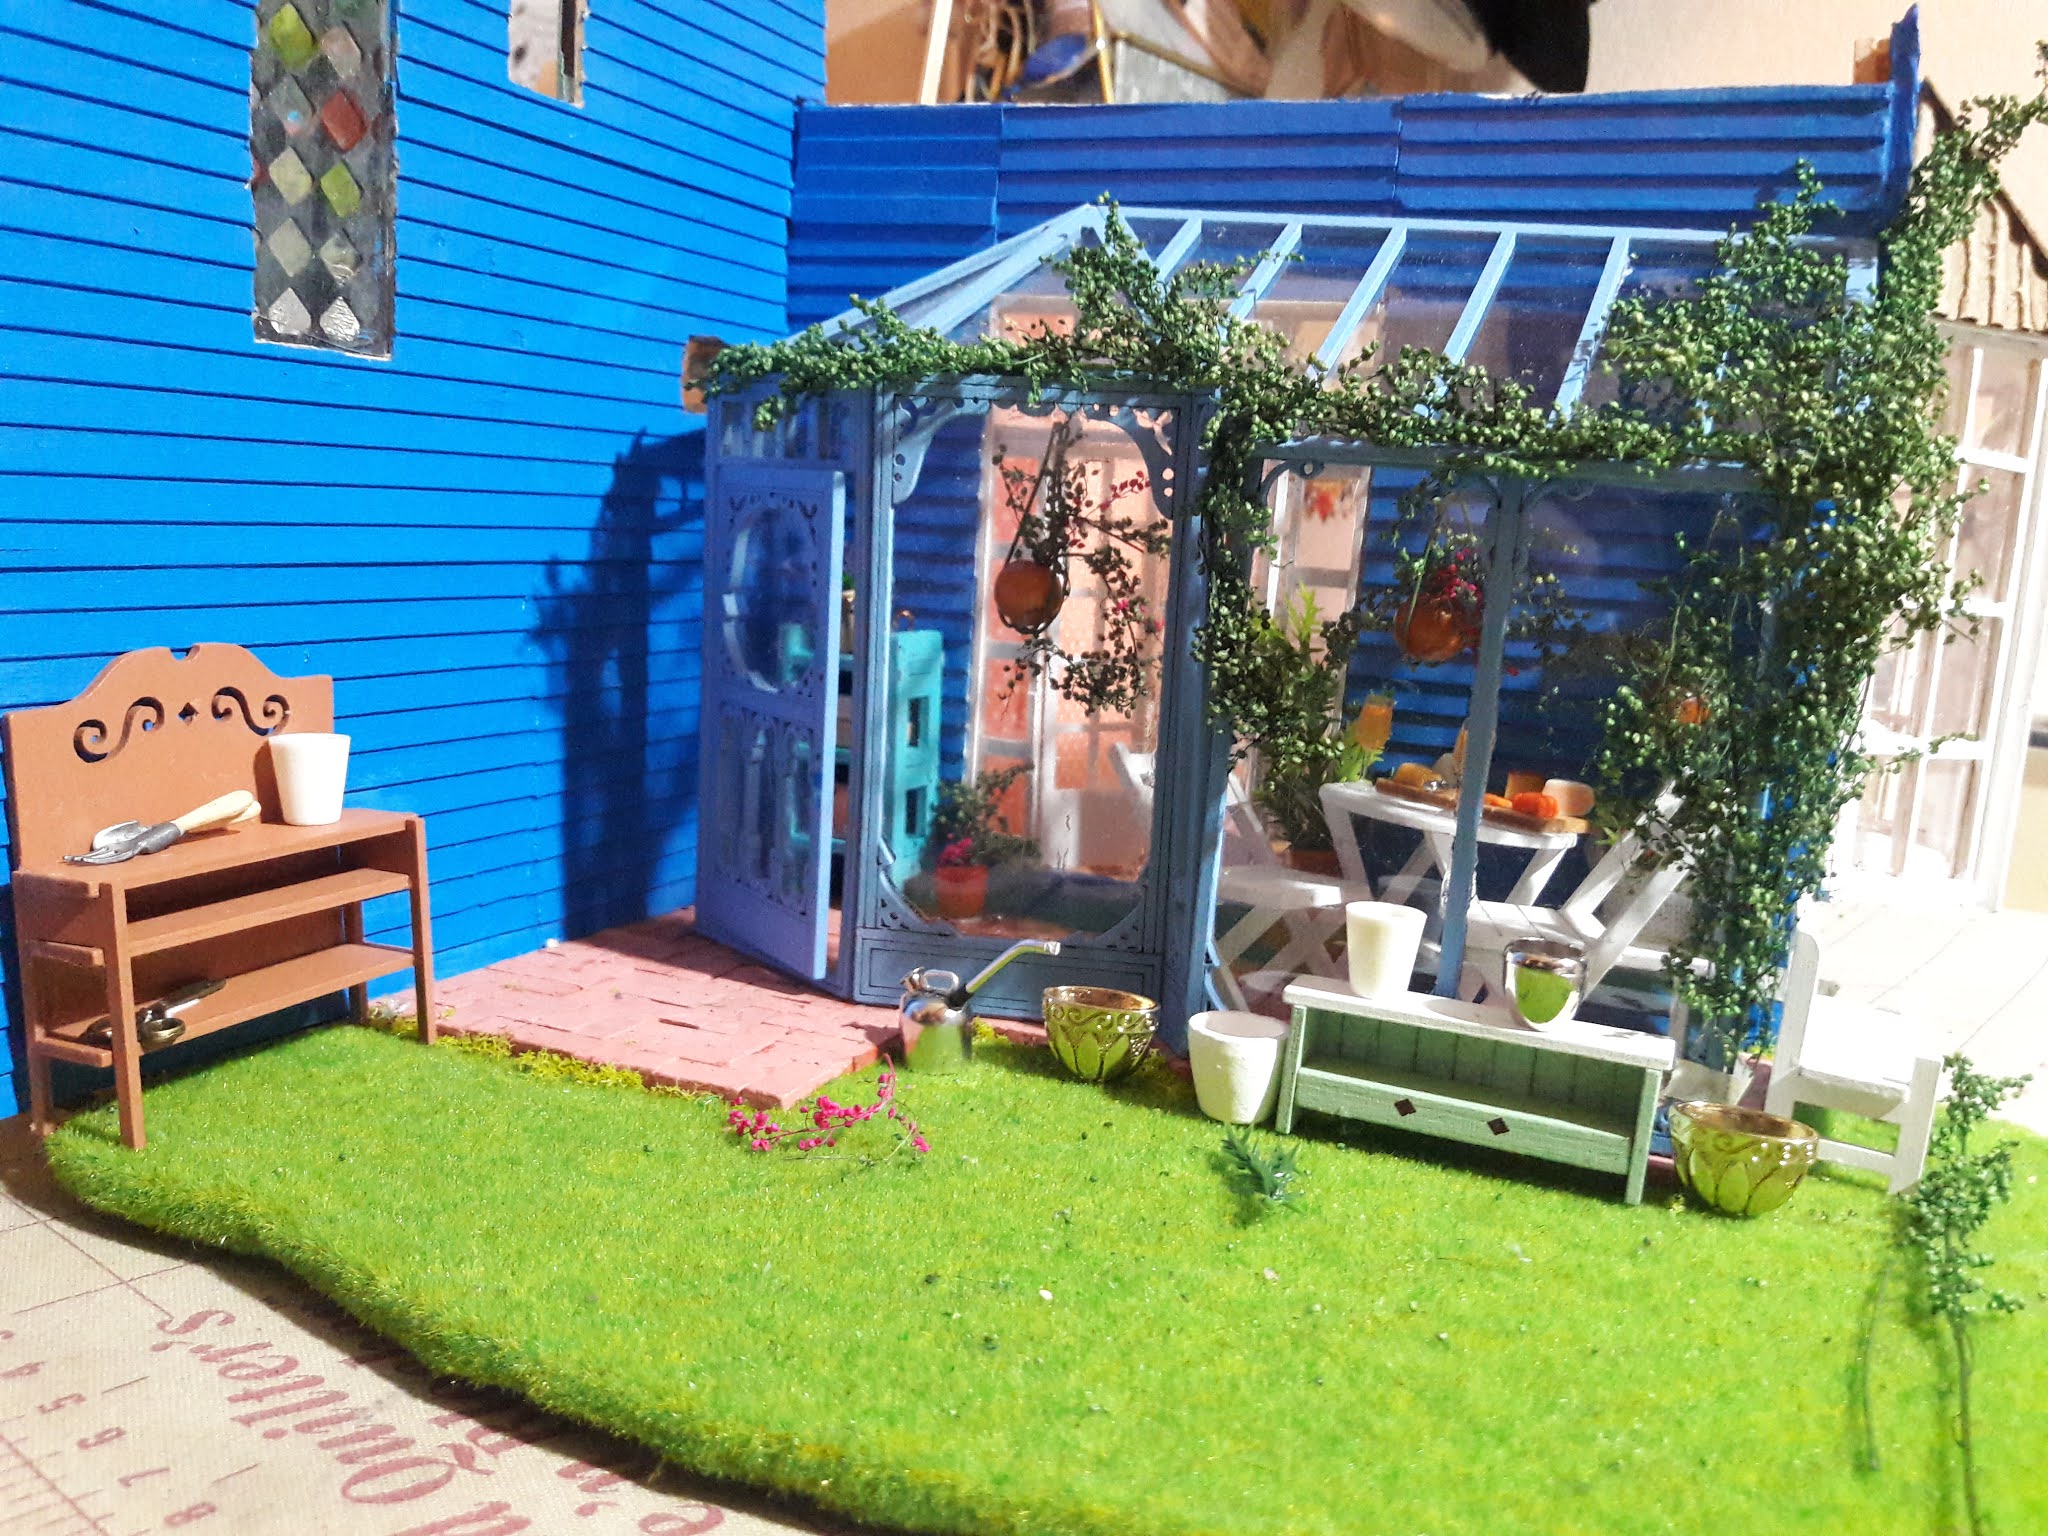
I'll feature the trailer first, 

since it's the only kit I have completed 

not just assembled the furniture and the accessories.

Sink, hot plate and oven
I have loved the delicate tiny work of putting the parts together!

I have been down and feeling very not creative since the virus hit us

and having these kits to work on has been a god send

To spend hours assembling all the tiny parts

A bit of mindless assembly

A cozy bed
 that takes all your attention

to make a cohesive whole, is just what I need to feel better

Even my Hubbs likes the results

The kits themselves come in a flat box

 full of lettered baggies of parts, 

a book of instructions and a few sheets for wallpaper 

flooring, books and pictures 

All of which you assemble yourself

It is very much a puzzle

hmm, that chandelier is wrong
  

Most of the kits also come with paint, glue and a few tools 

But you will need more

A pair of needle nose pliers is essential 

as is an exacto knife, a pair of snips and real tweezers

the ones that come in the box are a joke.

I also suggest clamps, big and tiny, 

A nook for eating and reading
 

I've been using binding clips for little things 

that need a bit of pressure until the glue dries 

 A pair of sharp scissors for precise cutting paper

Masking tape


All you need for a get away


Skills you will learn while making this kit

Time is relative, I can loose whole days

Patience. Because throwing things across the room,

when they are this small, is a disaster!

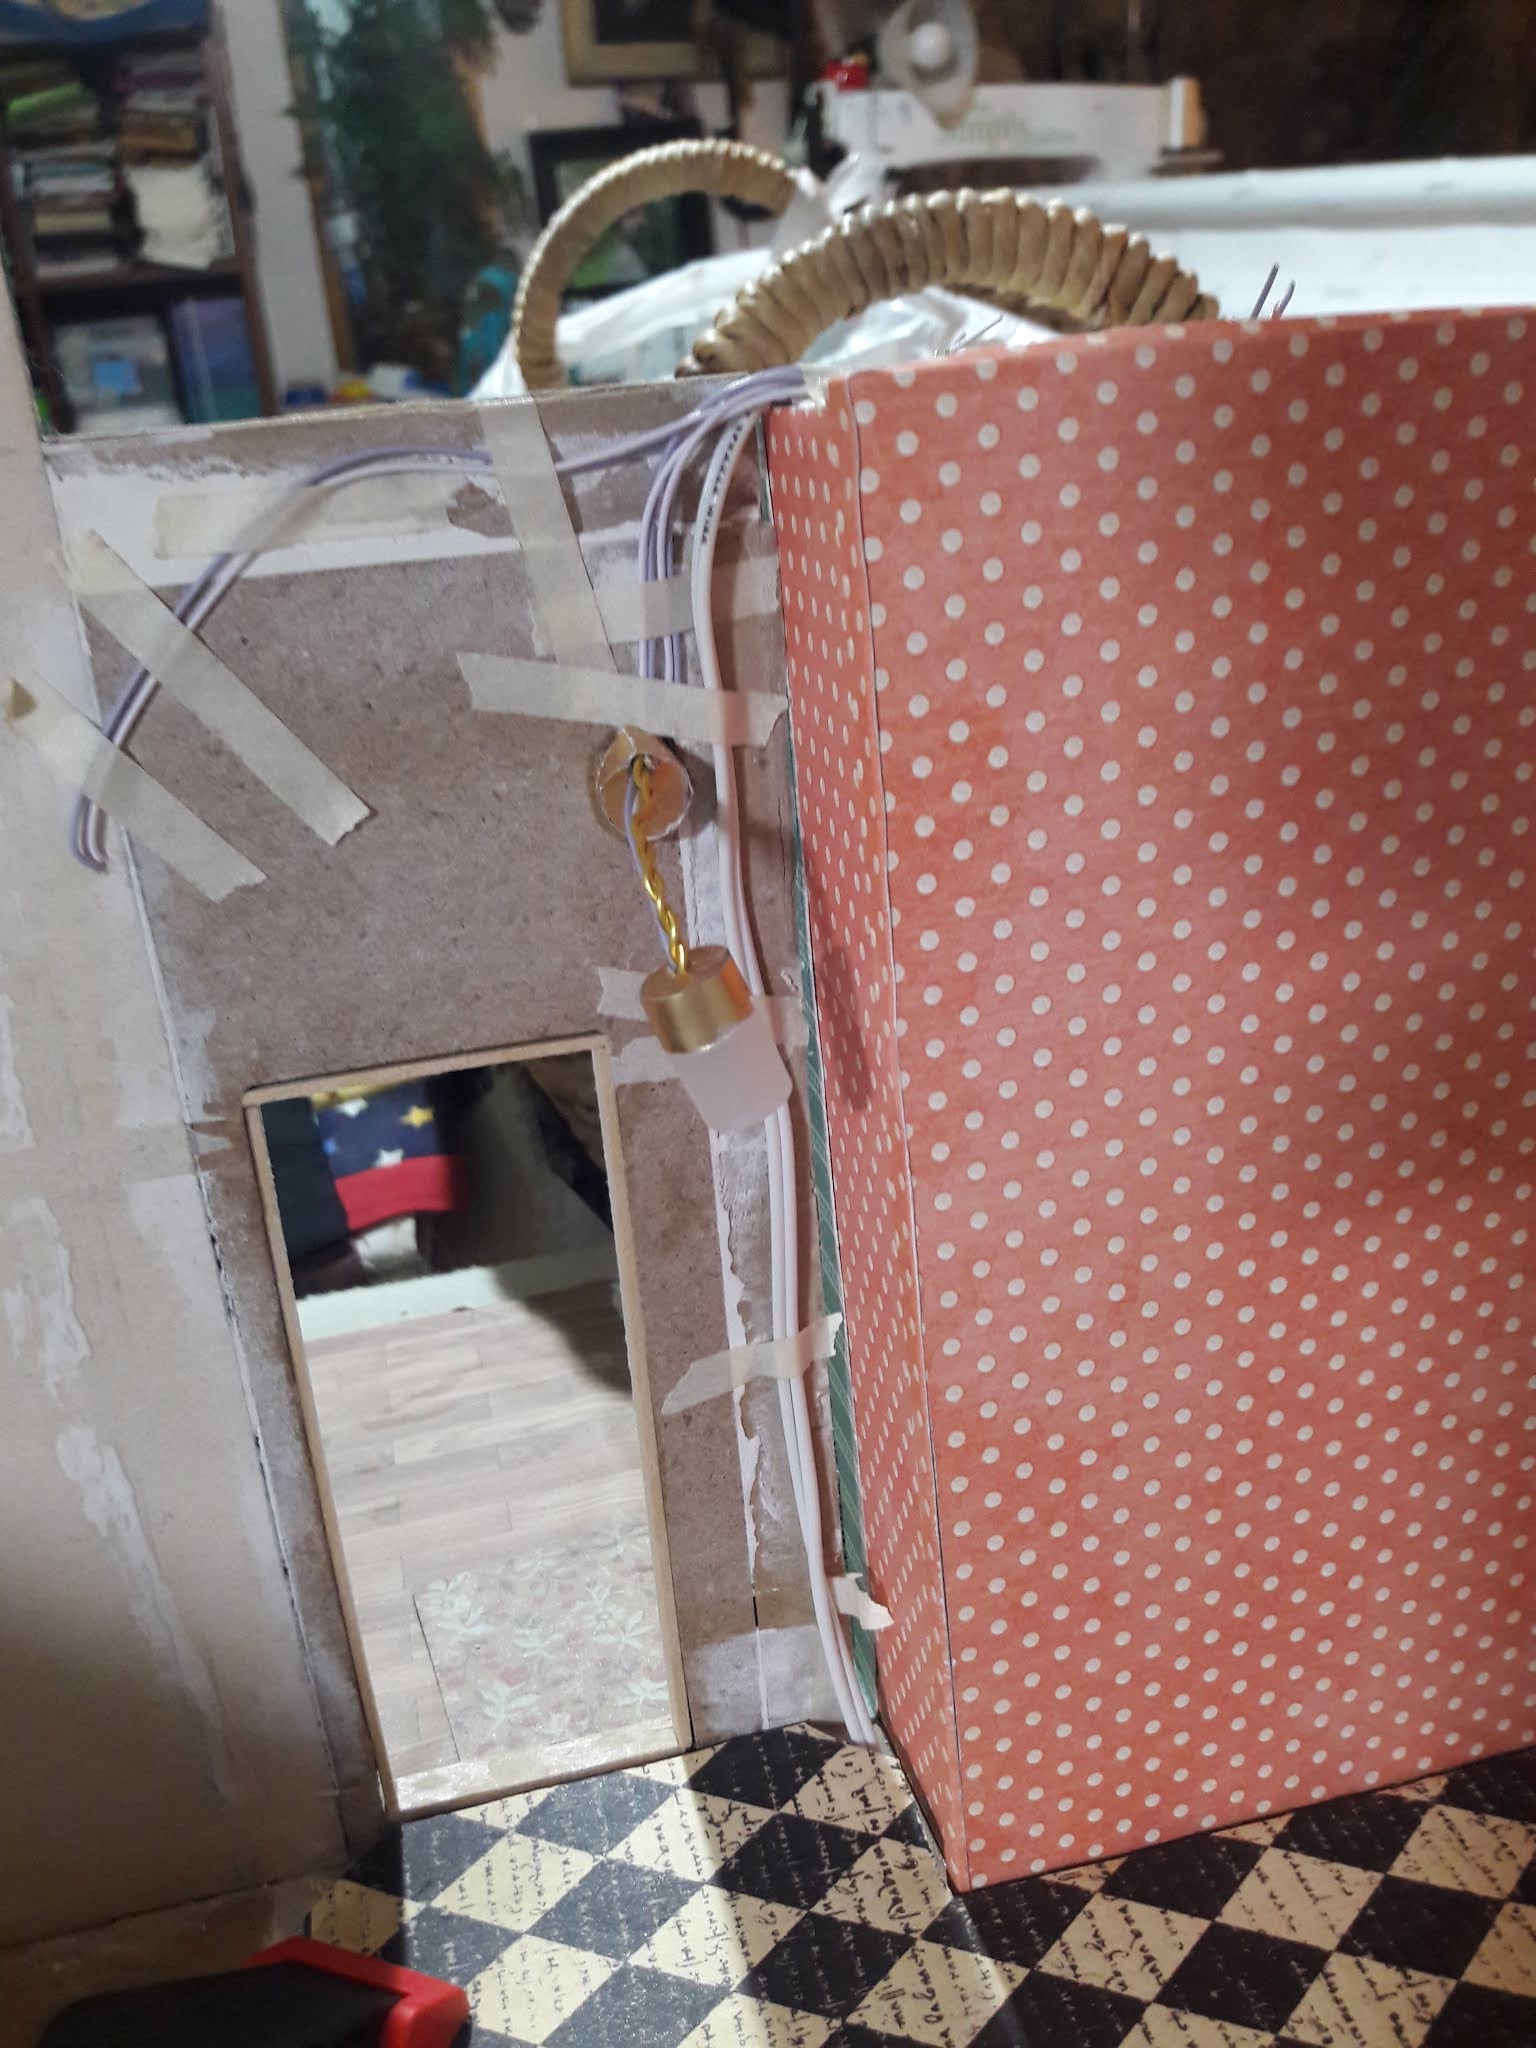
Electrical wiring is easier than you thought

Some new tools


For a dollhouse, that is.


My desk now


So now let the kitbashing start in earnest!


LinkWithin

Related Posts with Thumbnails