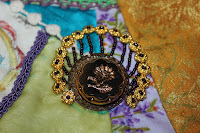
So now that it has been published, I get to share this with you all!
It's in the latest CQ Magazine on sale now at magic cloud!
Materials
A large cabochon, button, or piece of jewelry for a centerpiece
Silk ribbonGlass seed beads
Beading needle
Nymo beading thread
Felt or the piece you are currently working on
E6000 glue
Sandpaper
Clover water soluble blue marking pen
Choose your focal piece (cabochon/
button/etc.) first.
For a focal piece that has no hole or place to sew it down, sand the bottom first with some heavy grit sandpaper. Then use a small amount of E-6000 to glue it down to the felt. You may then sew the item to the project or the felt backing by running your needle and thread through the felt.
Note: It is better to glue the item to the felt and then sew it to the project rather than gluing directly to the project.
Then decide how the design should
progress. Do I want it round, offset, or
shaped?
Mark this line using the blue pen.
There are two ways to do this type of embellishment. This tutorial shows how to do it on a piece of felt for later application. You may also do it directly on the piece in progress.
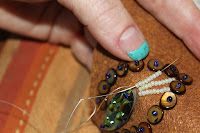
Stitch the smaller focus beads down around the marked line. For this project, I choose flat polished horn beads and #11 seed beads.
Now add the lines of beading between the main focal item and the smaller focal items. Fill your needle with enough beads to fill the space between. Don’t worry if it is not a symmetrical number of beads, this will vary, depending on that space and the size of your beads.
Secure the line of beads by coming back up and tacking the thread down between every 3 beads to secure the line. If your line is wobbly after this,
pull the thread through your line of
beads again once or twice more, this
should straighten everything out.
Now for the silk ribbon crown. Choose your colors for top and bottom row and start on the top (outer) row first.
Secure the ribbon on the back by pulling through the ribbon.
The outer crown complete.

To stitch the loop, come up through the felt/fabric and loop the ribbon around a paper blending stick aka smudge stick, keeping ribbon flat with no twists. Stitch down through the felt/fabric as for a simple Japanese ribbon stitch.
Do the same stitch in front of your first circle to complete your crown.
You can add as many rows as you like.
I leave the stick in the loop, until I have taken the next starting stitch, so I don’t pull the preceding loop out. You may leave the stick in for several loops if desired.
[Note: You can find paper blending sticks with the sketching materials, they come in several diameters.]
.
just so you don't think I'm perfect or anything I put the Brass filigree circle under this glass button so I didn't have to cut a hole in the CQ piece so it lays flat.
If you do cut a hole to accommodate the shank of the button make sure you take a few buttonhole stitches around the hole so the fabric doesn't fray over time


