Translate

Showing posts with label tutorials. Show all posts

Monday, March 30, 2020

My keeping up the moral challenge

A sketch to start


 In the spirit of "Keeping up moral"

and practicing what I preach


I am going to try to keep up with pictures and

posting my progress on this project


Here is where everything starts

An Idea, 


Peacock on the velvet dress
That leads to a drawing

or in this case a drawing set down long ago


because I liked the way it looked but never used
Although That's not quite true either

I did use it on a dress

A dress I have yet to finish

but the peacock is done here

Nekkid block in it's frame

But I digress


This is typically how I start a project


I get all my thoughts in one place and start


Dress paper pattern
I like using the blank ends to dress pattern paper

because it tears away fairly easily

without distorting my sewing

I draw the pattern I want to use on it first with

pencil and then again with sharpie so I can see it

I pin it down and lay down stem stitch for an outline


Sorry sidways


 Then fill in what ever stay stitching I need

to keep the whole thing stable

While I stitch away


 Not too shabby for a nights work


If you want to know what bits and pieces

I am working with

just leave me a message here

or on FB And I will try to answer it


Friday, March 8, 2019

How I made the Suffragette doll

First special tools you will be needing to make your job easier,
 a light iron on fusible web for lining the body parts. 
It helps to keep the parts from looking lumpy after you stuff it.  
Its also handy for drawing out the pattern pieces on It also helps to keep your stitching hold firm.

A pair of hemostats for turning the arms and legs I can't stress this enough, You need a pair! 
The turning tool is nice but I only use it for the bigger body part.

First thing you are going to do is draw and cut out the body parts from fusible webbing, I like to have 2 coordination fabrics for the body and sleeves and one for the "pants" then  there is the "skin" fabric.
leaving a 1/4" seam allowance so there is a line to follow when sewing.
you will need 4 arms, 4 legs and 2 bodies. The pattern comes from Tilda's seasonal by Tone Finnanger.

Since the legs are bigger at one end then taper to a thin point, I like to cut out a piece of fabric for the pants and one of "skin"for the bottom then sew them together at the knees,
iron on the webbing on the wrong side of the fabric (ask me how I know!) do this for 4 legs pin them all right sides together and follow your seem line.
repeat this for the arms, giving yourself "sleeves"of the body fabric
Try turning the legs first as they are a little bigger and will give you some practice before trying the smaller arms.
put the hemostats into the leg all the way to the toe, you will be crinkling up the fabric quite a bit here. dont worry it will all come out in the stuffing.
now with one finger in between the points of the hemostats push the fabric into the jaws as far as you can and clamp them closed tight.
now give the end a bit of a sideways twist and pull towards yourself pushing up on the outside as you go.
this part is difficult to get going so you may have to restart it a few times.
once the tip is turned the rest of comes out pretty quickly. Do this to all 4 limbs and the body.

I stuff the arms first, mostly to get them over with, I wrap some thin strips of leftover batting around the end of the hemostats and shove them all the way down to the tips. Then just keep stuffing until it's full.
Repeat for the other arm.
The legs you only stuff to the knees where you will stop and sew a line 2-3 times across so they bend. 
continue stuffing until they are mostly full, do this for the body also. You want to leave a little room at the end of each leg and the body for sewing it all together.
I will pin the legs onto one side of the body, sew them down. Then flip the body over and pin the other side down, folding over the seam allowance, prior to making a straight seam to attach the legs.
Now You will need a long needle, I have used a basting needle, to attach the arms.
I will position the arm till it looks right then pin ti on in 2-3 places and sew around it until it's on good and tight. 
don't worry if you leave big gaps I go around 2-4 times until I get them all and the arm is on and not wobbly.


Now on to the hair! This is the fun part.
I use Home spun by Lion brand,
for my dolls hair because it is versatility. if I want it to look like straight hair or curly hair this stuff works great.


you will need about 12-16 strands of however long you want it, make it a little longer as you will be trimming it later.

I give you a few links1, Link2, Link3, for sewing on hair as frankly, they do a better job than I could


 I hope this was helpful.
Let me know if I need to clarify anything.


Saturday, January 12, 2019

Hi-bear-nation & tutorial for cathedral windows

Nene
See what I did?
Yeah, I know it's not great if you have to explain it.

*Sigh*

I find myself explaining
a lot

To the point where I don't want to speak

to any one

any more.

Honu
Beach scape
I get my "bah humbugs" early

Or late

I can never decide which.


  I want to hibernate. 


 This doesn't mean I haven't been busy.

  I wandered into appliqueing again via a few things bought in Hawaii last years and never gotten to.              

When I realized I never showed you all The Honu (turtle) protector of the islands! I finished him before thanksgiving

The Nene, Hawaii's state bird, not quite done. The baby nene still needs it's beak& legs, the corner stones need to be done and then the berry vine they like to eat needs doing.

And the beach-scape background has been started it will have a lady swinging on a hammock with her quilting and a drinky


Then I found out my oldest and dearest friends mom has breast cancer so I'm making her a snuggle quilt for when her chemo gets going.

Also linking with Oh Scrap! cause everything I do is scrappy!

I hope it's cheerful enough for when she can't manage


 I also found an OOOOld UFO!

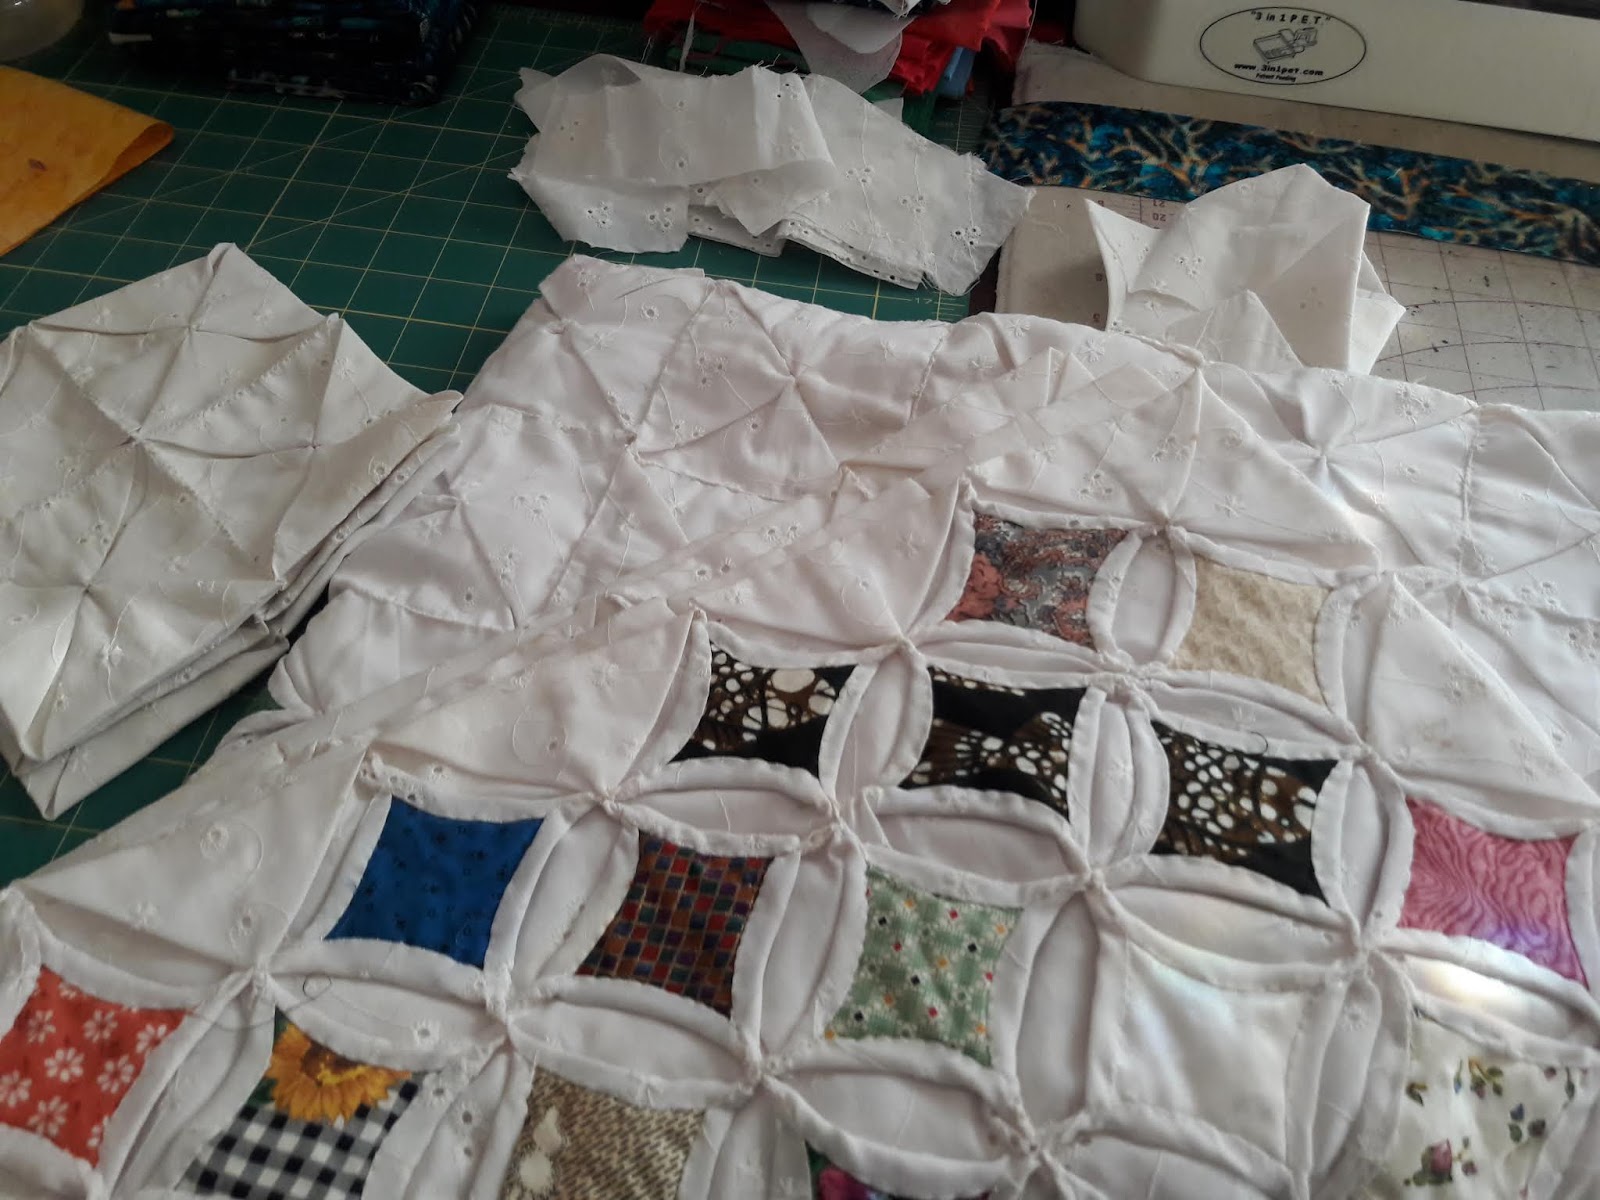
A cathedral windows quilt I started back when my old, old , old machine died so I'd have something to do.

I don't remember when I put it aside but it went everywhere with me for a while.

This is a great project if you travel a lot.

It takes up a minimum amount of space and you only need a pin cushion a needle, scissors and thread

Unless you let it grow out of control then it's like kudzu, everywhere all at once!

I'll show you how easy it is,
you need an even amount of 7" squares of whatever cotton you like,


I've used eyelet lace renovated from an old skirt here.


 Fold the square in half

and sew both ends

Leaving the long end opposite the fold open


Turn inside out so the seams are not showing

                 
Like this


Now open the pocket till you form a square

The seams should form a straight line right down the middle
(where my finger is pointing in the picture)

Crossed by the raw edge. and Iron nice and flat.

Don't worry about finishing this as it will be under all the folds that are coming next.


Fold like an envelope so all the points meet in the middle.

Iron nice and flat again.

Now sew just the tips of the points together so they all meet in the center.

Leave it floppy so you can put your finger underneath it.

I'll tell you why in a minute


Now sew the whole mess together!

I like a fast and easy whip stitch here


Don't worry about being too neat they will all be hidden by the 2"-2.5" squares you are going to use for the window effect

BTW this is a great project for those 2"-2.5" charm square packs you have lying around


Now place a square right in the middle of the square formed by your seams, pin it.


 See how my finger is demonstrating how to fold over the edge?

That is how you are going to cover all those raw edges!

Now pin the corners down
then pin the fold over right in the middle

The ends should fold over automagically

If they don't it shouldn't take to much encouragement to make 'em

Pin them down too.

Sew down.


I use a scoop stitch method here.

Sorry about the blurry but it's hard to sew and take a picture!
This is why I leave the center points floppy,
 so I can get my finger in there to sew it all down!

If you want to sew it down when you have finished the patches on either side go ahead


Now those pesky corners........

Take a stitch so you catch both sides of the fabric

As I have shown here

Pull thread through

Take another stitch where you went in initially

Then angle your needle ( Like in the picture)
catch the other side of the fabric

Pull through

 Both sides should pull together making a neat point

Scoop stitch to the bottom where your next stitch will go

Rince/repeat until you are done.

If you have never done one of these before I would start with just 4 squares

See how you like doing it before you go crazy

Like I said, Kudzu.

Now for those of you who noticed this clever little thing and want one, Extra credit!

It's easy-peasy!

Requires 1- 3.5" square

Folded in half as a triangle, right sides together.

Sew along both edges, leaving enough room, so you can turn it and stuff it.

Don't go to crazy and don't use batting, unless its really loose fluffy batting.

Hand sew the seam closed when you are done.  

Now take both bottom ends of your triangle, where the fold is.

Sew them together, securely, nice and tight.

and Voila!      A pin cushion ring!        Brilliant!

Bonus fact, if you fill the end point with walnut shells (about half way) before you stuff it you will have a bit of needle sharpening.
I don't recommend emery, unless you are using a really tight weave fabric - OR - you want to double up on fabric.

Because after a while using it, the emery will start to leak out through the needle holes and leave you with a floppy pin cushion.

I get my walnut shell from the pet store, in the reptile bedding section.
       It's a huge bag that, will last you for ever, so be warned.

LinkWithin

Related Posts with Thumbnails