Translate

Friday, April 30, 2021

More Jacobin

Back to my hole,

Oooh look! An artsy photo!


But It's a fun hole, full of embroidery technique to practices your skills on.


And now that it is back to gloomy I can prove that I actually went outside for a while

 with this lovely pinkish color I have picked up! 


Battlement couching, burden stitch, flyleaf and raised stem
 

 Why is it I never take photos of a thing 

till I'm halfway finished with it?


pictures are best in sunlight though.


Anyway having fun here so it don't matter


Progress!


 Lest you think this happens overnight 

I have been working on this thing since November.


So many stitches here from Padded buttonhole with bullion picots, to more battlement stitch, satin stitch, Flyleaf stitch, a crapton, (I  have it on good authority, that is a valid measurement!) of french knots.


I an determined to finish this someday........


Sunday, April 25, 2021

Class Hexies

 I have just realized I have never shared my class hexies.

 As many of you may or may not know, I ran a crazy quilting and embroidery class at Gathering Fabrics Quilt shop in Woodinville  Washington, at least I did in the before times.

And if you didn't know already I like color.

The back
 

                                   Lots of it!

    I try to teach the intimidated to love their colors! 

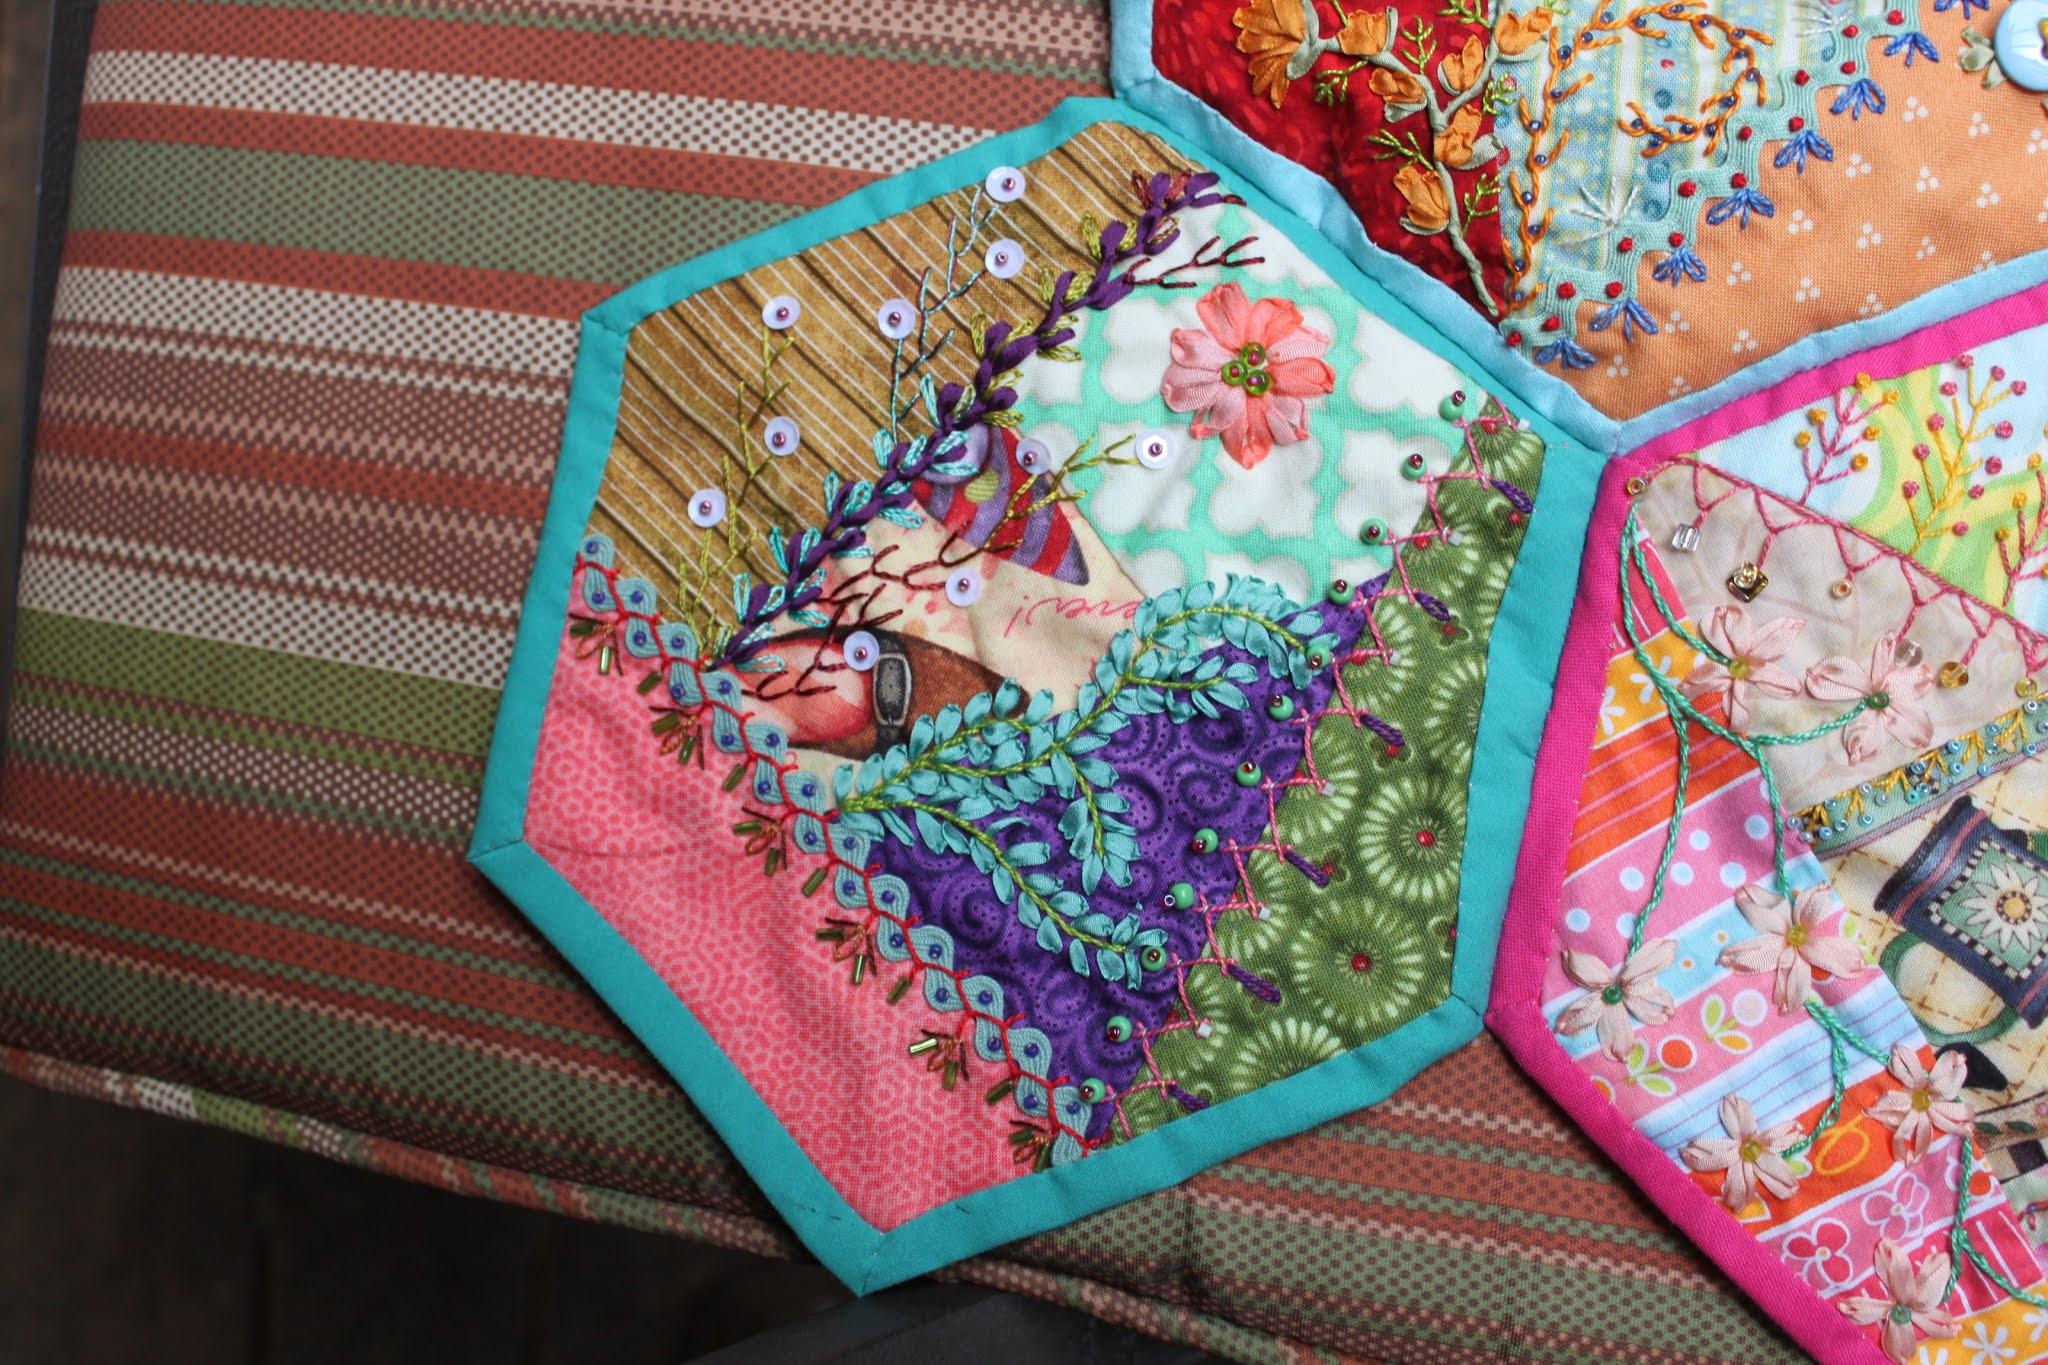
     This is the little bit of CQ I use to demonstrate.

  Every Hexie is self contained and different


So here is a simple one of mostly pinks, 

which I tried to balance through out the block

Especially tamping down the impact of that bright saturated pink on the right, by making a lot of light blue strait stitch stars

And making a spray of pink vines in the lower quadrant and a big pink flower opposite


Here is another big balancing act

I used a lot of dark blue accents and spread them around to balance the dark blue patch on the right.

The flowers on the yellow patch are beaded

And the spray of leaves are silk ribbon on fly stitch


Here again, I balance the the patch 

By sewing a motif or seam opposite or tangential to the color of the main patches in the block 

Going in a clockwise direction around the block, to keep the eye moving around the block


So keeping the first few patches in mind 


I repeat this concept through out all the blocks on this quilt


I Teach out of Jennifer Clouston's Foolproof Crazy Quilting book

And I try to follow the patterns she shows in her book

So I can demonstrate them to my students in class 


I also tried to use as many readily available items on the quilts as possible to take the 

"It's too expensive" quotient out of it.

All the threads are DMC size 8 twist and the sequins are a plastic set I got at joannes

Many of the buttons are those from off coats or the extras you get with a new blouse


or plain ones I have in my stash

Which I glamour up with beads

Like the bug I made here in the upper green patch,

with layered buttons and beads to hold them together.

Notice also the plastic flower beads in the bottom patch, where no two are alike.


I have found you can do this when the pieces are of a like enough color, 

They don't have to be matchie-matchie to work together

It's also a good place to use a bunch of "Leftover" or extra beads.


As long as the beads are of like color or hue they all play nice together on the block

I have used a lot of my leftover bits and pieces on this quilt, 

To show you can make something beautiful no matter what you have to hand.


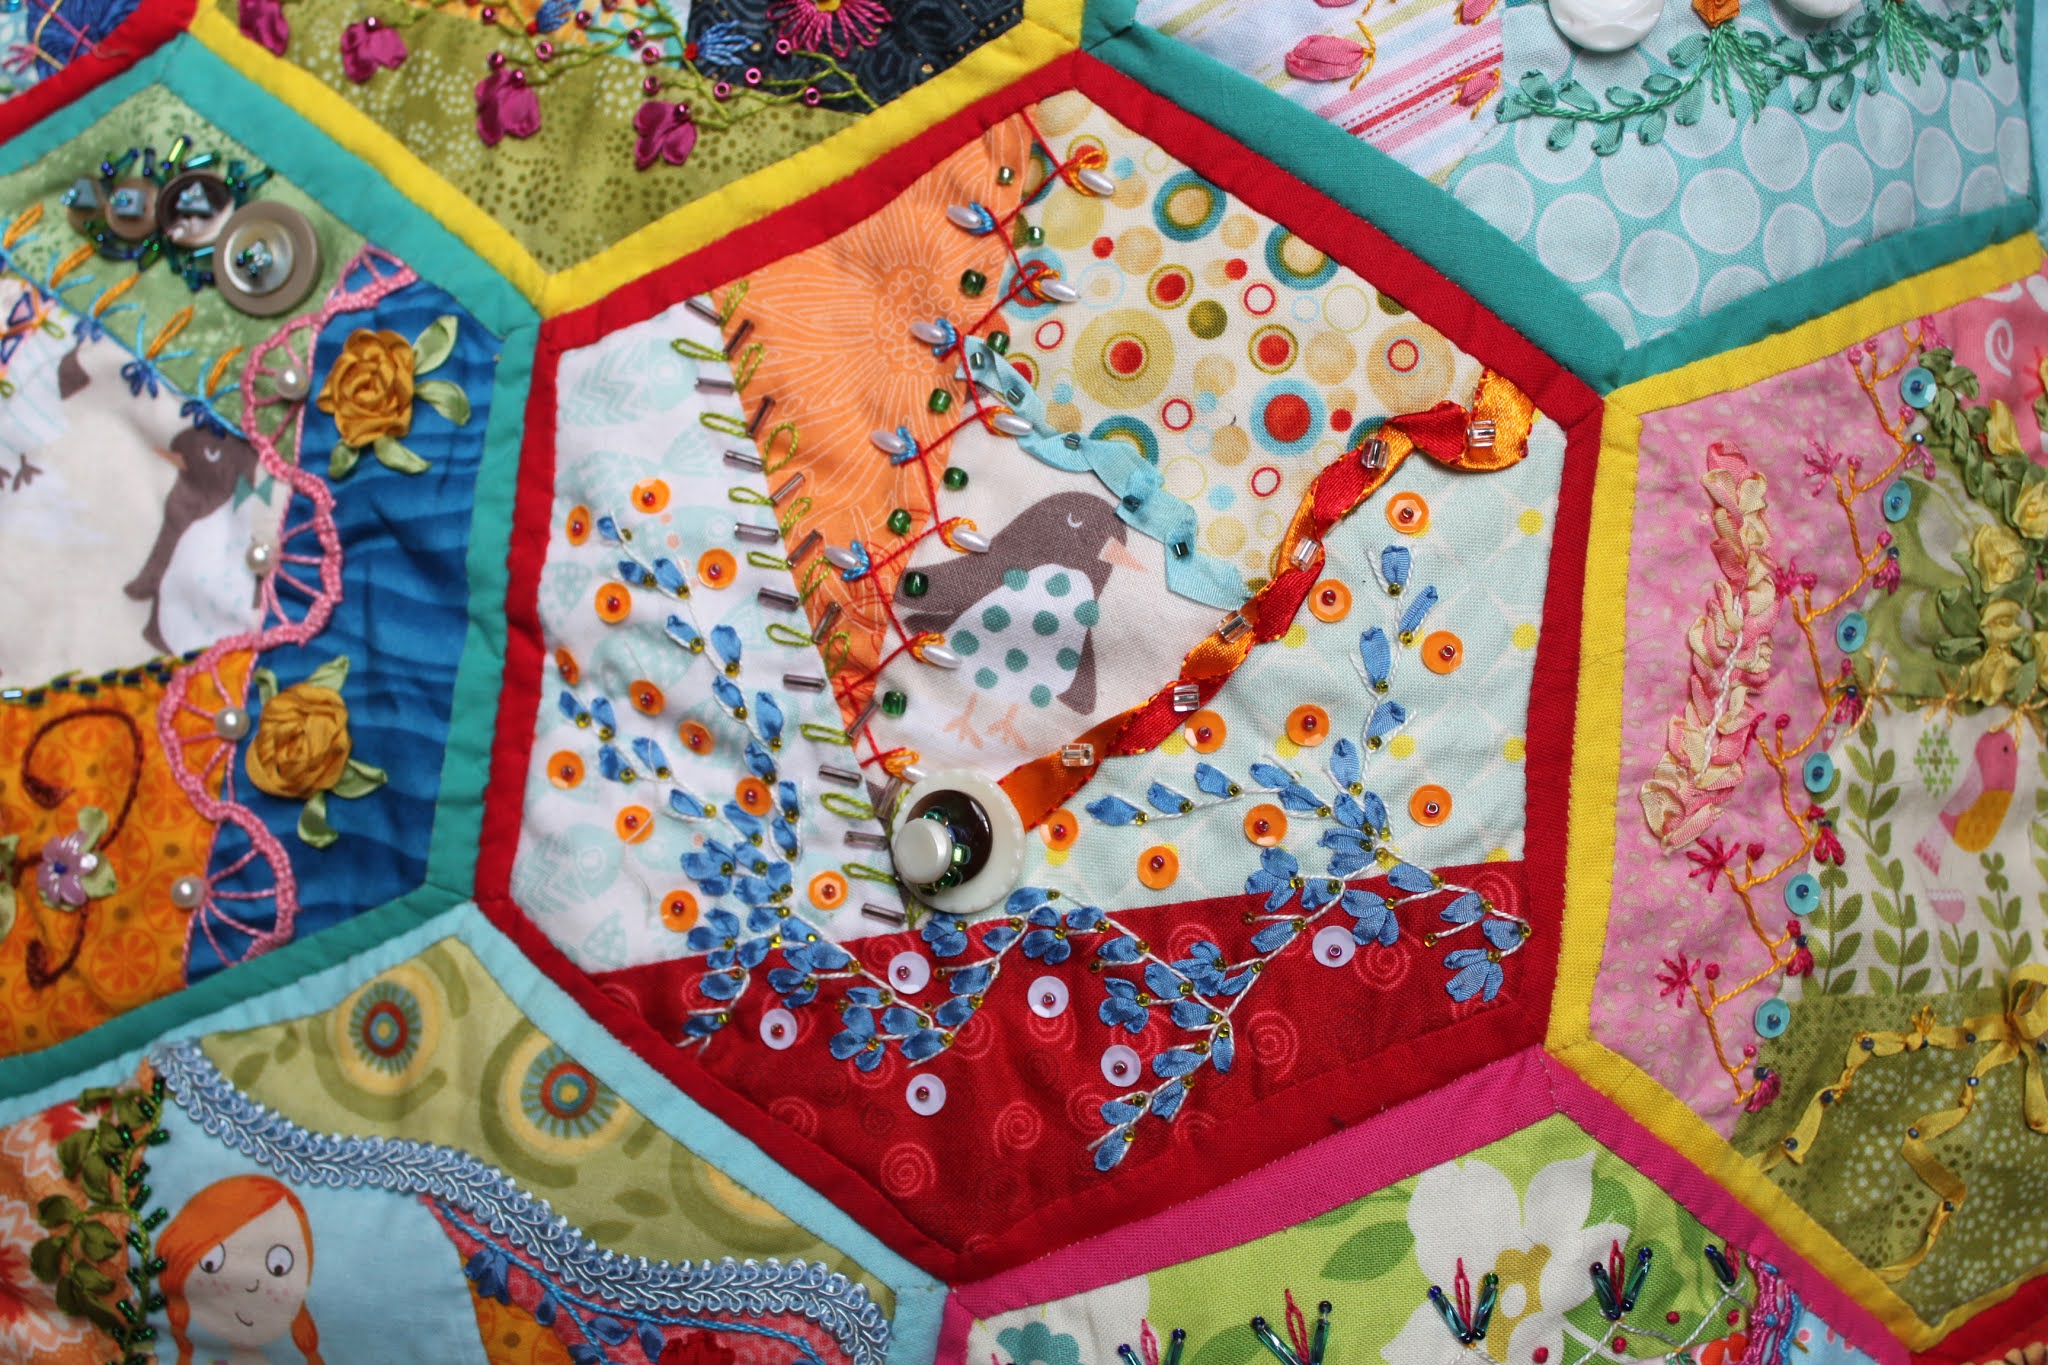
More button stacking and saturated color balancing here


The three big white buttons are of the same color and size but are different patterns to one another


The beads anchoring the big pearls at the bottom 

and the beaded butterflies at the top 

are from my "It fell on the floor" box and are all different


I have also used about 180 different fabrics 

230 beads, buttons, sequins, lace, 

                                  ribbon bits and doo-dahs

 And 30 different stitches in DMC and Silk ribbon embroidery


On this little quilt so far, I had been keeping a record

 but I lost track somewhere around the penguins.

I have a few more blocks, leftover from classes, that I haven't quite finished yet.

I was hoping to get back to them but got sidetracked by the plague.


Thursday, April 22, 2021

Jacobin embroidery

I have fallen into this hole


This Jacobin embroidery hole


That goes on

Satin, weaving and buttonhole


And on

Stem stitch roses


And on


Satin, woven filling, lazy daisy

Oh my god it goes on


But I am having so much fun with the different techniques


 Which makes this a fun hole to be stuck in

and as it it is sunny here for a few days, till it goes back to the usual seasonal gloom and incessant rain, 

I am doing this outside on the back deck, getting a pink glow two hours at a time.


 With my constant companion, Violet


 Molly is less impressed


I am working out of Tatiana Popova's book but drafted my own version of her design

Sunday, March 7, 2021

The snail

 So my DD#2 has requested a quilt to cover her new king size bed (!)

 So we started by picking colors and fabrics


Equilter is really handy for this

I told her to pick 2-4 of every color she wanted 

and we would narrow it down from there


then we had to pick a pattern that she liked


This was the pattern I made for her first "big girl" quilt when she was 8

she also picked the pattern for this one


This was the first Quilt I ever made (not actual) Its crib size and was originally made of clothing scraps and the most hideous purple polyester geometric for the back because it was bargain basement cheep and all I could afford at the time.

It was wonky, barely square and I was really proud of it.

It was originally intended for her older brother 

but he received a quilt from my maternal grandmother that he fell in love with so this was handed down to the next child in line DD1 who rejected it in favor of a sunbonnet Sue & Sam

When DD2 came along this poor old quilt had been neglected rejected and sad but she fell for it and still loves it as a cuddle quilt.

It has been repaired to several layers of backing and many repairs of the diamonds as they shredded over time


So now to choose a new pattern


 There were several choices 


That I already had on hand in books and magazines


                                  They were nice buuuuut


                                               Until this one caught her eye but it needed 

something                                                                     


 more 


OOOOH!


This one!


Allrightythen


Now I need to plug all those colors in.

Remember those?   Pink, Grey and yellow? 

I ended up adding a turquoise for a contrasting pop because otherwise the colors blended and were rather distressingly boring to look at


With an emphasis on the yellow swirly pattern which was her favorite

so not my colorway

or my comfort zone

But Baby girl gets what Baby girl requests 

when she actually asks for something, so here it goes.


First I needed to make sense of the  pattern. That only took a week to design


 This pattern combines snails trail with Ocean waves and is definitely NOT for beginners!

What you see here is the final draft, of about 5 or 6 drawings, to plug in the colors the right way round.

I also made myself a chart for each block to keep them straght because the snail block needs 2 different directions to make the swirls go the right way!

Advice if you are trying this at home; charts and labels, are a godsend!

Problem one, I miscalculated the yardage I needed and was constantly having to go back and order just one more yard of something. *Ugh*

Problem two, I miscalculated the size of the triangles for the long diamond squares AFTER I cut out all bazillion of them *Ack!*

 Lesson; Make samples of everything so you can sus out the mistakes and correct them BEFORE you waste a yard and a half of fabric cutting it the wrong size. *Smackhead* 

I should know this by now after quilting for 30+ years bUt nOOOOO........ -.-     *sigh*

For this pattern there is a cutting ruler that saves multo time and ageta getting the long diamond triangles right, It's the creative grids 2 peaks in 1 6" triangle #CGR2P1. This makes life SOOOO much easier!

Also cutting the diamond triangles a quarter inch bigger so you can cut it down to the right size, helps to keep from loosing your corners, which you really do need to make this pattern look right


Here is one whole block of 4 snails, 4 diamonds and the corner block that make up one panel


And here is the whole shebang.


After much backing and forthing, ordering just one more yarding and changing this color for that oneing, because yikes that one is just eeew! 


The flimsy is done!


You can see the secondary swirlies here^


 Its definitely big enough though!

Big enough to hit the floor on both sides of my queen size bed and drape over the end!


 I made it big enough that I had to add the last 2 feet onto my quilting table to accommodate it and its still a bit big! by a foot. foo! -.-


Next step the back and then on to quilt the sucker!  I need Wine first.

Friday, February 5, 2021

SRE Embellished Cabachon Tutorial

 So now that it has been published, I get to share this with you all! 

It's in the latest CQ Magazine on sale now at magic cloud!

My thanks to Lisa Plooster Boni for inviting me to be a part of her lovely magazine,
 So exciting! I love being able to say "I've been published!" Tee-Hee!
 
 
I Have reprinted most of it here with a few extra pictures

Materials

A large cabochon, button, or piece of jewelry for a centerpiece   

Silk ribbon
Glass seed beads

Beading needle
Nymo beading thread
 

Felt or the piece you are currently working on 

E6000 glue 

Sandpaper
Clover water soluble blue marking pen

First gather your treasures. I like to “audition” several different items before I sew it all down.

Choose your focal piece (cabochon/ button/etc.) first.


For a focal piece that has no hole or place to sew it down, sand the bottom first with some heavy grit sandpaper. Then use a small amount of E-6000 to glue it down to the felt. You may then sew the item to the project or the felt backing by running your needle and thread through the felt.

Note: It is better to glue the item to the felt and then sew it to the project rather than gluing directly to the project.


Then decide how the design should progress. Do I want it round, offset, or shaped?

Mark this line using the blue pen.


There are two ways to do this type of embellishment. This tutorial shows how to do it on a piece of felt for later application. You may also do it directly on the piece in progress. 


 Stitch the smaller focus beads down around the marked line. For this project, I choose flat polished horn beads and #11 seed beads.


Now add the lines of beading between the main focal item and the smaller focal items. Fill your needle with enough beads to fill the space between. Don’t worry if it is not a symmetrical number of beads, this will vary, depending on that space and the size of your beads.

Secure the line of beads by coming back up and tacking the thread down between every 3 beads to secure the line. If your line is wobbly after this,


pull the thread through your line of beads again once or twice more, this should straighten everything out.


Now for the silk ribbon crown. Choose your colors for top and bottom row and start on the top (outer) row first.

Secure the ribbon on the back by pulling through the ribbon.

The outer crown complete.

To stitch the loop, come up through the felt/fabric and loop the ribbon around a paper blending stick aka smudge stick, keeping ribbon flat with no twists. Stitch down through the felt/fabric as for a simple Japanese ribbon stitch.

Do the same stitch in front of your first  circle to complete your crown.


You can add as many rows as you like.


I leave the stick in the loop, until I have taken the next starting stitch, so I don’t pull the preceding loop out. You may leave the stick in for several loops if desired.


 [Note: You can find paper blending sticks with the sketching materials, they come in several diameters.]


Lastly I trim the excess felt being careful not to snip any of the ribbon on the front or the back. It is now ready to place on anything you like.


.


 just so you don't think I'm perfect or anything

  I put the Brass filigree circle under this glass button so I didn't have to cut a hole in the CQ piece so it lays flat. 

 
If you do cut a hole to accommodate the shank of the button make sure you take a few buttonhole stitches around the hole so the fabric doesn't fray over time

This is the original Cabochon From another piece that will be featured in  a future CQ Magazine so I will leave that till later.
 
Go get your copy of Crazy Quilt Magazine if you love CQ like I do, 
it has so much more eyecandy in it to enjoy!


LinkWithin

Related Posts with Thumbnails